¶Getting started
¶The exercise: interactive DNA docking to a protein
Start up the PROT-DNA-BS-v1 exercise using the graphical interface.
UnityMol will open, Biospring will start up in the background, and the
visualization will connect to the running simulation. More
instructions are provided in the video walkthrough.
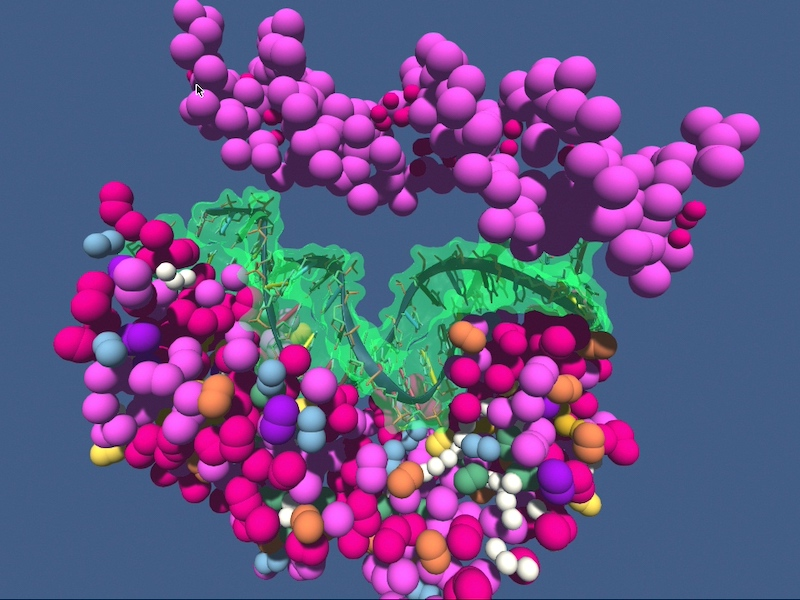
The fixed protein and the flexible DNA are shown as multi-colored beads. A transparent DNA surface is shown for guidance to indicate the actual solution to the docking problem.
When you manipulate the simulation, be gentle, otherwise the simulation will crash and you need to start over. The main task is to:
- dock the DNA onto the protein, getting as close as possible to the true solution
- note this is a coarse-grained representation and a perfect match may not be possible
- pay attention to when the electrostatic background field of the protein starts to kick in the process and automagically drive the DNA towards it location
¶Minimal UnityMol tips
- on the right hand side you have a python console. You can
quit each tutorial by typing
q()plus enter. - you can modulate the applied force with the
f(value)shortcut, wherevalueis something in the range from roughly 0.1 to 6.0. You can check for the current value withfp(). - if you want to save the coordinates of the current scene, use
s(), which writessnap.pdbin the current directory (it is indicated in the console upon saving) - if you do not need the console, you can hide it with the arrow in a blue circle
- on the left hand side you have the main graphical menu. you can control the visualization, trajectory player speed and a few other settings, such as visual effects
- the menu can also be hidden with it’s attached arrow in a blue circle, when you don’t need it
¶Video Walkthrough
You’ll learn:
- Work with an electrostatic field driving docking
- Use simplified elastic network representations for efficient docking
- Get visual guidance to speed up complex operations
Click like 👍 on the video if you’re excited to get started!